
Artificial flowers can look polished online but disappoint at home when glossy petals, straight stems, repeated colors, and the wrong vase expose their construction.
To make artificial flowers look real, choose natural textures and muted colors, reshape every bloom, bend wired stems, vary heights and angles, mix bloom stages, and use a correctly proportioned vase. Hide visible mechanics, copy real growth patterns, add believable foliage, and keep the finished arrangement clean, restrained, and slightly imperfect.
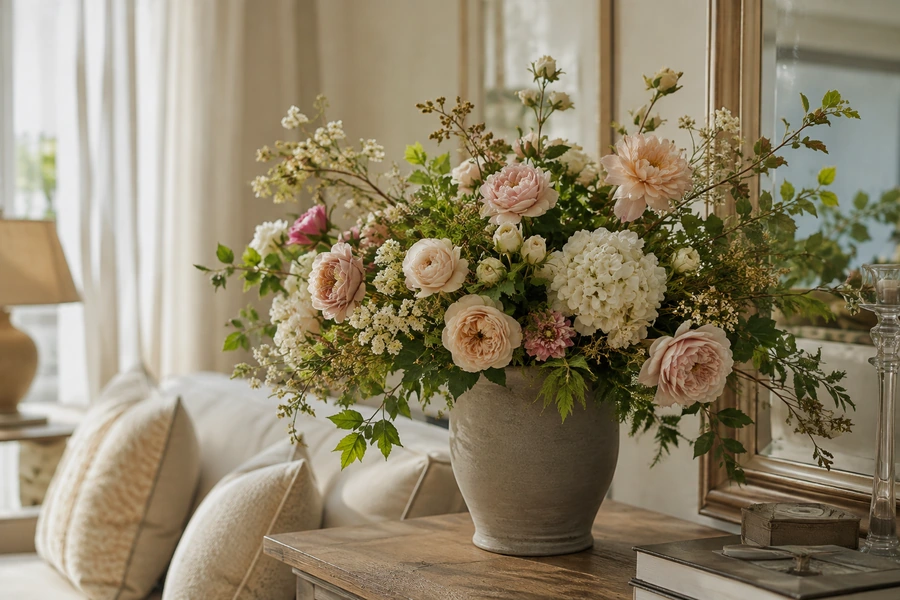
Realism rarely depends on one expensive flower. It comes from several small decisions that help the arrangement behave, balance, and age like fresh botanicals.
Why Do Artificial Flowers Sometimes Look Fake?
Even premium flowers can look artificial when they are displayed directly from the shipping box. Compression, repeated shapes, visible wire, and rigid symmetry reveal that the arrangement was manufactured.
Artificial flowers usually look fake because of excess shine, identical petals, flat colors, perfectly straight stems, crowded spacing, visible plastic parts, unrealistic proportions, and accumulated dust. Correcting these clues often improves realism more than simply adding more flowers or buying a larger arrangement.
Modern faux flowers can reproduce the form and texture of fresh blooms more successfully than older plastic products. However, material quality still matters. Better Homes & Gardens recommends delicate silk-style materials for petals and latex-covered or rubber-like surfaces for flowers and foliage that naturally have waxy textures.
The Main Realism Problems
| Visible Problem | Why It Looks Artificial | Best Correction |
|---|---|---|
| Strong plastic shine | Fresh petals rarely reflect light evenly | Choose matte finishes |
| Every flower is fully open | Real arrangements contain different bloom stages | Add buds and partial blooms |
| Straight stems | Living stems bend toward light and available space | Create gentle curves |
| Identical heights | Produces a manufactured upper line | Trim and bend stems |
| Evenly spaced colors | Looks planned by a machine | Cluster colors irregularly |
| Visible wire or glue | Reveals the construction | Turn, trim, or conceal it |
| Oversized bouquet | Makes the vase look unstable | Reduce stems or enlarge the vessel |
| Dense flower wall | Removes natural negative space | Open the arrangement |
| Dusty petals | Changes color and texture | Clean before styling |
I evaluate artificial flowers from the distance at which they will normally be viewed. A reception-desk arrangement needs stronger close-up details than a floral installation positioned several meters above the floor.
How Do You Choose Artificial Flowers That Look Real?
Good styling cannot completely hide weak materials. The fastest route to a realistic arrangement begins with flowers that have believable color, texture, scale, and construction.
Choose faux flowers with matte petals, natural veins, secure centers, adjustable wired stems, several nearby color tones, and realistic bloom sizes. Compare each product with photographs of the living flower. Avoid strong chemical shine, identical petal shapes, obvious fabric fraying, and colors that appear brighter than anything found in nature.
Tip 1: Match the Material to the Real Flower
The most realistic material depends on the flower being copied.
Soft polyester or silk-touch fabric works well for:
- Peonies
- Roses
- Ranunculus
- Hydrangeas
- Poppies
- Sweet peas
Real-touch or softly coated materials can work well for:
- Orchids
- Tulips
- Calla lilies
- Anthuriums
- Magnolia leaves
Molded plastic is often convincing for:
- Succulents
- Berries
- Eucalyptus
- Waxy leaves
- Seed heads
- Firm tropical foliage
A material should reproduce the natural surface. A glossy coating may suit a rubber plant leaf, but the same shine makes a garden rose look plastic.
Better Homes & Gardens notes that rubber-like and latex-covered materials can imitate naturally waxy foliage, while fabric petals can create a more delicate floral appearance.
Tip 2: Choose Muted, Layered Colors
Flat color is one of the clearest signs of an artificial flower.
A natural blush rose may contain:
- Warm ivory near the base
- Pale peach around the center
- Dusty pink outer petals
- Slightly darker edges
- Green or brown near the calyx
I look for two or three closely related tones rather than one uniform color.
Muted shades usually appear more realistic than highly saturated colors. White, cream, blush, dusty rose, pale yellow, muted blue, lavender, and natural green are forgiving choices.
Bright red, blue, purple, and neon pink require stronger material quality because every printed detail becomes more visible.
House Beautiful’s designer guidance recommends looking for realistic texture, color variation, and an organic overall shape rather than a single flat finish.
Tip 3: Mix Different Bloom Stages
A bouquet in which every flower is fully open can look frozen in time.
Real flowers normally appear in several stages:
- Closed buds
- Opening buds
- Half-open blooms
- Fully open focal flowers
- Older or relaxed outer petals
I use the largest open flowers near the visual center. Smaller buds extend toward the edges and upper lines.
For a rose arrangement, I might combine three open garden roses, five medium blooms, and several buds. For peonies, I use fewer fully open heads because their size creates strong visual weight.
Variation makes the arrangement feel collected rather than produced as one identical batch.
Tip 4: Inspect the Flower Center
People often focus on the petals, but a weak center can expose a faux flower immediately.
I check for:
- Obvious molded plastic
- Thick glue
- Loose yellow fibers
- Repeated identical stamens
- Unnatural black centers
- A visible hole around the stem
- Artificial pollen that falls easily
When the center looks poor, I turn the flower slightly away from direct view. I may also place it deeper inside the arrangement rather than using it as a focal bloom.
Premium flowers belong at eye level and around the visible front. Less detailed flowers can provide volume behind them.
Tip 5: Buy Wired, Adjustable Stems
A wired stem allows the flower to develop a natural line.
Rigid stems force every bloom to stand in the same direction. Wired stems can be:
- Curved gently
- Shortened by bending
- Directed outward
- Grouped around another stem
- Opened after packing
- Adjusted for different vases
Afloral recommends bending, fluffing, and manipulating artificial foliage to create organic lines that resemble natural growth. Its unpacking guidance also recommends varying heights and angles rather than leaving stems in their compressed shipping positions.
I test the wire before purchase when possible. It should hold a curve without snapping or allowing a heavy flower head to fall.
How Do You Reshape Artificial Flowers After Shipping?
Artificial flowers are compressed to reduce packaging volume. Petals, leaves, and branches may remain folded until they are opened by hand.
Reshape artificial flowers one stem at a time. Open leaves from the lower stem upward, separate compressed petals, rotate flower heads, and bend wired stems into gentle curves. Compare the flower with a real botanical reference, and avoid excessive heat unless the manufacturer’s instructions specifically permit it.
Tip 6: Fluff Every Stem Individually
I never place an artificial flower directly from its package into the final vase.
I begin at the bottom and work upward:
- Separate the lower leaves.
- Turn repeated leaves in different directions.
- Open side branches.
- Rotate the flower head.
- Separate compressed petals.
- Check the final silhouette from several angles.
Hydrangeas require particular attention because dozens of small flower branches may be pressed into one flat cluster. I open each branch until the head becomes irregular and three-dimensional.
Afloral’s current unpacking guidance recommends reshaping artificial flowers according to the natural patterns of living flowers and using several heights and angles to build dimension.
Tip 7: Bend Stems Into Natural Curves
Living flowers do not grow as perfectly straight rods.
I create gentle movement by placing one hand near the base and another higher on the stem. I then form a broad curve instead of one sharp bend.
Different flowers require different lines:
| Flower | Natural-Looking Stem Direction |
|---|---|
| Tulip | Soft outward curve |
| Rose | Mostly upright with a slight lean |
| Peony | Gentle bend beneath the heavy head |
| Orchid | Long architectural curve |
| Poppy | Light irregular movement |
| Delphinium | Vertical with small side variation |
| Wisteria | Downward trailing movement |
Balsam Hill recommends bending and shaping artificial stems and layering different sizes, colors, and forms to create a more lifelike arrangement.
Tip 8: Change the Flower-Head Direction
A bouquet looks artificial when every bloom faces the viewer.
I turn some flowers:
- Upward
- Sideways
- Toward another flower
- Slightly downward
- Partly toward the back
Only the main focal flowers need to face the strongest viewing position.
Side-facing flowers create depth because the viewer sees the profile, calyx, and outer petals. A few partially hidden blooms also suggest that the bouquet continues beyond its visible surface.
Tip 9: Trim Factory-Uniform Stems
Artificial stems often arrive at one standard length. Keeping every stem unchanged creates a flat, circular top.
I cut stems with wire cutters rather than household scissors. Before cutting, I confirm the final vase and arrangement style.
I begin by removing less length than I think I need. A cut stem cannot be restored, while a slightly long stem can still be shortened or bent.
Afloral recommends trimming stems gradually because it is easier to remove more length later than to correct a stem that was cut too short.
For reusable rental inventory, I bend long stems instead of cutting whenever the extra length can be hidden safely inside an opaque vessel.
Tip 10: Remove the Most Obvious Manufacturing Clues
Before arranging, I inspect every stem under bright light.
I remove or correct:
- Loose threads
- Glue strings
- Plastic tags
- Crushed petal edges
- Exposed wire
- Bent calyx pieces
- Excess artificial pollen
- Strong mold seams
- Manufacturer labels
- Packaging ties
I do not pull aggressively at a thread near a petal seam. I trim it carefully with small scissors.
A minor flaw can be turned toward the back. A major visible defect should be replaced, especially when the flower will appear in a bridal bouquet, dining centerpiece, retail counter, or close-up photograph.
How Do You Arrange Faux Flowers Like a Florist?
A realistic flower can still look artificial when the arrangement is too symmetrical, too crowded, or incorrectly proportioned.
Arrange faux flowers by establishing the main shape, adding foliage for structure, placing focal blooms in uneven groups, and filling selected gaps with smaller flowers. Vary height, depth, and direction while leaving negative space. The arrangement should look balanced without appearing perfectly mirrored.
Tip 11: Copy the Growth Pattern of Real Flowers
Before styling a flower I do not know well, I look at photographs of the living plant.
I study:
- Stem direction
- Leaf placement
- Bloom angle
- Natural height
- Branch spacing
- Bud location
- How the flower bends under its own weight
Afloral recommends using images of the natural flower as a styling reference.
Tulips naturally lean and continue moving in a vase. Orchids grow along a curved stem. Hydrangeas form irregular rounded clusters. Delphiniums rise vertically. Wisteria trails downward.
Copying the actual botanical habit is more reliable than arranging every flower into the same round bouquet shape.
Tip 12: Use Focal, Supporting, and Filler Flowers
I divide the arrangement into three functional groups.
Focal flowers create the main visual impact:
- Peonies
- Garden roses
- Hydrangeas
- Orchids
- Magnolias
Supporting flowers connect the focal blooms:
- Ranunculus
- Spray roses
- Tulips
- Dahlias
- Anemones
Fillers and movement stems create texture:
- Baby’s breath
- Wax-flower-style sprays
- Berries
- Delphiniums
- Small branches
- Greenery
One simple formula uses three focal flowers, five textural stems, and eight filler stems. Real Simple presented this 3-5-8 approach in 2025 as an accessible method for building a balanced moderate-sized bouquet. It is a useful starting formula, not a rule for every vessel or design.
Tip 13: Arrange Focal Flowers in Odd Numbers
Three or five focal flowers often create a more natural rhythm than two or four placed in matching positions.
I do not arrange them at equal distances. I may place two flowers relatively close together and a third slightly higher or farther away.
Current florist guidance published by Martha Stewart recommends using odd numbers of focal blooms to create a more natural appearance.
Odd numbers are not mandatory. A pair of matching stems can create a clean modern design. However, odd groupings are a useful correction when an arrangement feels rigid.
Tip 14: Vary Height, Depth, and Angle
Height alone is not enough. Flowers also need depth.
I divide the bouquet into:
- Front flowers
- Middle flowers
- Rear flowers
- High movement stems
- Low edge flowers
- Side-facing flowers
Some blooms sit near the vase opening. Others extend outward or rise above the main group.
Martha Stewart’s floral-design guidance emphasizes proportion, bloom size, natural growth patterns, and depth when constructing an arrangement.
A realistic bouquet should remain interesting when viewed from the side. If every flower head sits on one forward-facing plane, the arrangement will look flat in person and in photographs.
Tip 15: Leave Negative Space
Adding more stems does not always make a bouquet look more luxurious.
Natural arrangements contain openings through which the viewer can see:
- Stems
- Leaves
- The interior structure
- Neighboring flowers
- Parts of the vase
I stop adding flowers before every gap disappears.
Negative space is especially important for:
- Garden-style bouquets
- Japanese-inspired arrangements
- Modern branch displays
- Olive and eucalyptus designs
- Asymmetrical centerpieces
Large hydrangeas and peonies fill space quickly. I balance them with thinner branches rather than adding several more large flower heads.
Tip 16: Cluster Colors Instead of Distributing Them Evenly
A manufactured bouquet often places one pink flower, one white flower, and one purple flower in a repeating sequence.
I create loose color zones instead.
For example:
- Two blush roses may sit near one ivory peony.
- A pale lavender group may remain concentrated on one side.
- One deeper bloom may appear near the lower center.
- Greenery may connect the clusters without separating every flower.
The result should remain balanced, but not mathematically distributed.
I usually limit a realistic arrangement to two or three dominant colors plus greenery. Too many equally strong colors can make the bouquet look decorative rather than botanical.
How Does the Vase Make Artificial Flowers Look More Real?
The wrong vase can expose thick stems, visible wire, foam, and unrealistic spacing. It can also make a bouquet appear too short, crowded, or unstable.
Choose a vase that supports the natural scale of the flowers. Opaque vessels hide artificial stem ends, while narrow openings control small bouquets. Wide bowls need floral frogs, wire grids, or other mechanics. As a starting point, the vase may measure roughly one-third to one-half of the visible stem height.
Tip 17: Match Vase Size to Stem Length
A short vase beneath very tall dense flowers may look unstable. A tall vase containing short blooms can hide too much of the arrangement.
Afloral’s vase guidance uses a practical starting ratio in which the vase is approximately one-third to one-half the height of the stems. Its separate care guidance suggests that a 40-inch stem often works with a 12- to 20-inch vase.
I treat these ratios as starting points rather than fixed rules.
| Arrangement Style | Useful Vessel |
|---|---|
| One to three branch stems | Tall narrow vase |
| Loose rose bouquet | Medium vase with controlled opening |
| Peonies and hydrangeas | Low bowl or compote |
| Tulips | Simple cylinder or pitcher |
| Orchids | Low bowl with a floral frog |
| Wildflower mix | Informal ceramic jug |
| Modern minimal arrangement | Sculptural opaque vase |
Tip 18: Hide Artificial Stem Ends
Visible artificial stems can reveal internal wire, thick molded plastic, identical cuts, or unnatural color.
Opaque ceramic, stoneware, metal, or colored-glass vessels hide these details. Afloral specifically notes that opaque vessels can conceal stem ends and create a more convincing fresh-bouquet appearance.
In a clear vase, I may use:
- Decorative stones
- A fitted inner vessel
- Artificial water resin
- Carefully arranged foliage
- A bundle wrap around the stems
- Real water when the product permits it
When placing compatible artificial stems in real water, I seal open wired ends first to reduce rust risk. Afloral also recommends sealing cut ends before styling faux stems in water.
I replace the water regularly because cloudy or dusty water makes the arrangement look neglected.
Tip 19: Anchor Stems Instead of Letting Them Float
Loose stems can rotate, slide, and gather around the vase edge. This makes the arrangement look accidental rather than natural.
Useful mechanics include:
- Floral frogs
- Chicken wire
- Reusable dry foam
- Vase grids
- Floral tape grids
- Pebbles
- Sand
- Rigid stem sleeves
Afloral recommends sturdy bases such as floral foam, flower frogs, soil, or stones to hold artificial stems upright. Its vase guidance also supports floral frogs for low bowls and heavy-headed flowers.
The mechanics should remain hidden. I cover visible foam or wire with foliage, moss, stones, or a fitted insert.
A strong internal holder also lets me create intentional spacing instead of filling the vase until friction holds everything in place.
How Do You Finish and Display Faux Flowers Realistically?
The arrangement is not finished when the last stem enters the vase. Its surroundings, lighting, maintenance, and viewing direction affect whether people read it as natural.
Finish faux flowers with believable base materials, place them where real flowers could reasonably appear, use soft indirect lighting, and keep them free from dust. Rotate or rebuild seasonal arrangements before they become visually stale, and inspect the complete display from the room’s normal viewing angles.
Tip 20: Add One Believable Natural Detail
One natural or nature-inspired detail can connect the artificial flowers to their setting.
Options include:
- Real branches
- Dried seed heads
- Preserved moss
- Clean stones
- Natural twigs
- Dried grasses
- Fresh seasonal foliage
- Bark
- Matte artificial soil
I avoid mixing fresh and faux materials when their quality gap is obvious. A fresh premium rose beside a glossy artificial rose may make the imitation easier to identify.
A better hybrid design uses fresh foliage around high-quality faux focal flowers or combines dried branches with artificial blossoms.
I also avoid excessive artificial dew, glitter, perfume, and plastic butterflies. One restrained natural detail normally looks more convincing than several decorative effects.
Tip 21: Place, Light, Clean, and Photograph the Arrangement Carefully
A realistic arrangement can look fake in an implausible location.
I place faux flowers where fresh flowers could reasonably appear:
- Dining table
- Entry console
- Reception desk
- Bedroom dresser
- Kitchen island
- Retail counter
- Hotel lobby
- Event table
House Beautiful’s design guidance recommends placing faux botanicals in environments that support their natural character and surrounding them with colors and materials found in nature.
Soft daylight or warm indirect lighting is usually more flattering than a strong spotlight. Harsh light exposes fabric weave, glue, and shiny plastic.
Before displaying the arrangement, I:
- Dust the petals.
- Wipe the vase.
- Remove visible threads.
- Turn weak flower centers away.
- Check the arrangement from the doorway.
- Photograph it at eye level.
- Review the photograph in black and white.
A photograph often reveals an awkward gap, straight stem, or oversized bloom that the eye missed during arranging.
What Are the Biggest Mistakes That Make Faux Flowers Look Cheap?
Most weak arrangements fail through excess rather than simplicity. They contain too many colors, too many flower types, too much symmetry, or too many visible effects.
The biggest mistakes are using glossy flowers, leaving stems unshaped, choosing a vase that is too small, arranging every bloom at one height, displaying visible foam, adding too many colors, overcrowding the bouquet, and allowing dust to accumulate. Correct these problems before purchasing more stems.
Quick Correction Guide
| Mistake | Fast Fix |
|---|---|
| Bouquet looks flat | Turn flowers sideways and create depth |
| Arrangement looks crowded | Remove 20% of the stems |
| Vase looks too small | Use a wider or heavier vessel |
| Colors look artificial | Remove the brightest shade |
| Flowers look uniform | Add buds and vary heights |
| Stems slide | Install a frog or grid |
| Clear vase exposes wire | Use an inner vessel or opaque vase |
| Hydrangeas look crushed | Open every small branch |
| Petals look glossy | Move away from harsh direct light |
| Design looks old | Clean and rebuild the arrangement |
A simple arrangement of three excellent stems can look more expensive and natural than a crowded vase containing thirty weak flowers.
My Insights: How Do You Make Artificial Flowers Look Real? 21 Genius Tips for Gorgeous Looks
Artificial flowers look real when the viewer notices the composition before noticing the material. This requires believable imperfection, correct scale, and a clear relationship between flowers, vessel, room, and viewing distance.
The 21 tips work because they remove manufactured clues one by one. Realistic materials establish the foundation. Reshaping creates natural movement. Varied bloom stages and uneven groupings copy living flowers. Correct vase mechanics control proportion, while careful placement, lighting, and maintenance protect the finished illusion.
My main insight is that realism is not the same as perfect imitation. A successful faux arrangement needs to feel botanically possible.
The 21-Tip Realism System
| Stage | Tips |
|---|---|
| Choose | Match materials, use layered colors, mix bloom stages, inspect centers, select wired stems |
| Prepare | Fluff stems, form curves, change flower directions, trim lengths, remove manufacturing clues |
| Arrange | Copy growth, use flower roles, group odd focal blooms, vary depth, leave space, cluster colors |
| Finish | Match the vase, hide stem ends, anchor mechanics, add natural details, control display conditions |
Realism Begins With Restraint
I would rather use:
- Five convincing tulips than fifteen weak ones
- Three excellent branches than a crowded mixed bouquet
- One muted color family than six bright colors
- One stable ceramic vase than an oversized clear cylinder
- One natural curve than several dramatic bends
Restraint gives the eye fewer artificial clues to examine.
Imperfection Should Look Intentional
Random damage does not make a flower realistic.
Useful imperfection includes:
- Different bloom angles
- Uneven stem heights
- A few curved leaves
- One partially hidden flower
- Small color variation
- Open areas between stems
- Asymmetrical visual weight
Unhelpful imperfection includes:
- Frayed fabric
- Glue marks
- crushed petals
- Missing leaves
- Dust
- Bent wire showing through
- Unstable flower heads
The goal is controlled natural variation.
The Vase Is Part of the Flower
Many faux arrangements fail because the flowers and vessel are treated as separate purchases.
The vase controls:
- Visible stem length
- Arrangement width
- Stability
- Flower spacing
- Viewing height
- Style
- Realism of the lower structure
A narrow vase can make a small bouquet look intentional. A wide bowl can make heavy peonies look abundant. An opaque vessel can hide artificial construction instantly.
My Most Reliable Arrangement Formula
For an easy medium arrangement, I use:
- One sturdy opaque vase
- Three focal blooms
- Five supporting flowers
- Several small filler stems
- Two types of greenery
- Three different height levels
- One visible area of negative space
- One flower turned away from the viewer
- One lower bloom near the vase opening
- A hidden internal holder
I then remove one or two stems before deciding that the design is complete.
The Final Realism Test
I inspect the arrangement through five questions:
- Could these flowers naturally grow in these directions?
- Are the colors found together in nature?
- Does the vase appear capable of supporting the bouquet?
- Can I see obvious glue, wire, foam, or repeated patterns?
- Does the arrangement improve the room without dominating it?
When all five answers are satisfactory, the flowers do not need to fool every viewer at close range. They only need to create a convincing and beautiful floral experience in the space where they are displayed.
Conclusion
Choose believable materials, reshape every stem, vary bloom stages and angles, use the right vase, hide mechanics, leave natural space, and keep the finished arrangement clean.