
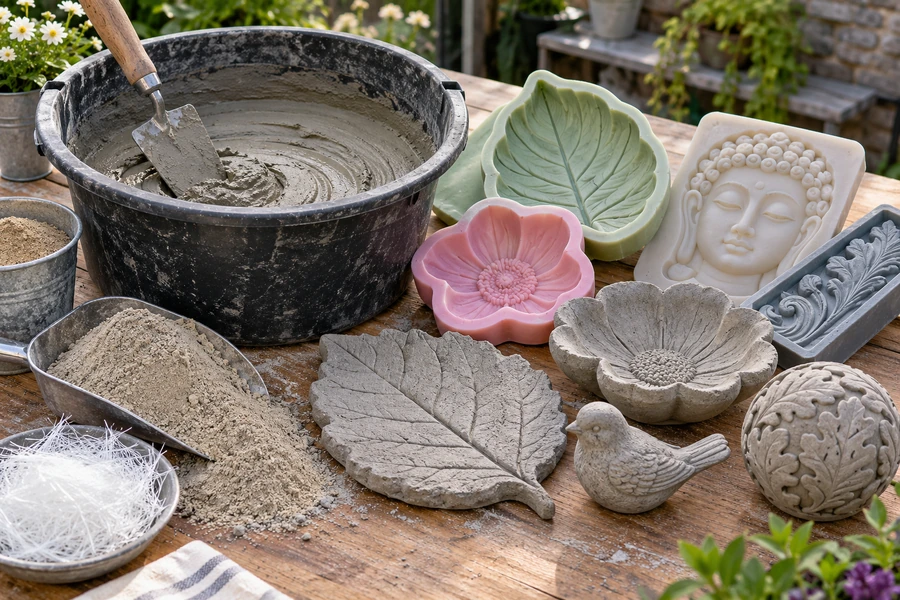
Garden ornaments need enough strength for outdoor weather, but a mix with large gravel can make small petals, faces, lettering, and decorative edges difficult to cast cleanly.
The best concrete mix for most small garden ornaments is a fine-aggregate, high-strength casting mix with little or no large gravel. Sand/topping mix, countertop concrete, or a fiber-reinforced fine concrete works well for detailed molds. Larger statues and thick ornaments can use conventional concrete, while thin or complex pieces may benefit from fiber reinforcement or GFRC.
The most important factors are aggregate size, water content, workability, curing, and outdoor durability. A mix that is technically very strong but cannot flow into the details of a mold may produce a worse garden ornament than a slightly finer mix that consolidates properly.
What Type of Concrete Is Best for Garden Ornament Molds?
For most small molds, the best concrete is fine enough to reproduce detail but strong enough to withstand outdoor exposure after curing.
Use a sand-based or fine-aggregate concrete for small and detailed garden ornaments. QUIKRETE specifically recommends Sand/Topping Mix for castings under 2 inches thick because it contains no large aggregate. For thicker castings, a crack-resistant fiber-reinforced concrete or other suitable general concrete mix can provide additional strength.
Fine Aggregate Matters More Than Many Beginners Expect
Ordinary concrete often contains:
- Cement
- Sand
- Gravel or crushed stone
- Water
That works extremely well for:
- Slabs
- Footings
- Steps
- Curbs
But the gravel becomes a problem when the mold contains small decorative features.
Imagine pouring concrete into a garden angel mold with:
- Fingers
- Hair
- Wings
- Facial detail
A 15–20 mm stone cannot fit neatly into every small section.
The cement paste and sand may enter the detail while coarse aggregate remains behind, creating:
- Voids
- Weak tips
- Missing detail
- Rough surfaces
This is why small ornamental castings generally benefit from a finer mixture.
QUIKRETE’s Practical Rule
QUIKRETE gives a particularly useful distinction for cast projects:
- For small castings, it recommends Crack-Resistant Concrete, which contains small fibers.
- For castings less than 2 inches thick, it recommends Sand/Topping Mix, because the absence of large aggregate allows the material to enter smaller areas more easily.
That is a useful starting rule for DIY makers.
Best Mix for Small Detailed Ornaments
For:
- Small statues
- Plaques
- Leaf casts
- Mushrooms
- Decorative animals
- Planter feet
- Thin stepping-stone details
I would start with:
fine sand-based concrete or mortar-style casting mix
rather than ordinary gravel concrete.
A garden-mold supplier similarly recommends rock- and gravel-free mortar mix or sand-and-cement mixtures for small detailed planter-foot molds.
Countertop Mix Can Work Very Well
Countertop concrete is designed to create:
- Smooth surfaces
- Good flow
- High strength
- Fine detail
QUIKRETE uses its Commercial Grade Countertop Mix in its own small decorative vase casting instructions.
That makes countertop mix a strong option for:
- Detailed statues
- Decorative bowls
- Smooth garden spheres
- Small architectural ornaments
It may cost more than basic concrete, but it can reduce the amount of:
- Surface patching
- Pinholes
- Missing details
after demolding.
Standard Concrete Works Better for Larger Pieces
Large garden ornaments such as:
- Thick statues
- Large stepping stones
- Heavy planters
- Pedestals
- Benches
can use a conventional concrete mix more effectively because there is enough room for coarse aggregate.
QUIKRETE’s standard Concrete Mix contains portland cement, sand, and gravel or stone and has an average compressive strength around 4,000 psi.
That is very different from a fine decorative casting mix.
For Very Thin or Complex Work, Consider GFRC
Glass-fiber-reinforced concrete, or GFRC, replaces conventional coarse aggregate with a fine cement-and-sand matrix reinforced with glass fibers.
Concrete Network notes that GFRC is widely used for decorative architectural pieces because it:
- Can reproduce ornate shapes
- Is lighter than conventional precast concrete
- Resists chipping
- Can be made in relatively thin sections
GFRC is useful for:
- Thin decorative panels
- Large hollow statues
- Detailed architectural ornaments
- Lightweight garden features
It is more advanced than ordinary bagged concrete, so beginners do not necessarily need to start there.
Simple Selection Table
| Ornament | Best Starting Mix |
|---|---|
| Small detailed statue | Sand/topping or fine casting mix |
| Leaf ornament | Sand/topping mix |
| Decorative plaque | Fine concrete/mortar-style mix |
| Garden sphere | Countertop or fine concrete |
| Thick stepping stone | Conventional concrete |
| Large statue | Fiber-reinforced concrete |
| Thin architectural piece | GFRC |
| Large planter | Standard or crack-resistant concrete |
My Basic Rule
The smaller the detail, the smaller the aggregate should be.
That single rule solves many garden-casting problems.
Can You Use Mortar Mix for Garden Ornaments?
Yes. Mortar mix can work well for small garden ornaments because it contains fine aggregate rather than the larger gravel found in conventional concrete.
Mortar mix can be a good choice for small statues, plaques, planter feet, decorative molds, and other thin castings where fine detail matters. Its sand-rich composition flows into small mold features more easily than gravel concrete. However, larger structural ornaments may benefit from conventional concrete, fibers, or another mix specifically designed for outdoor durability.
Why Mortar Works for Fine Detail
Mortar generally contains:
- Cementitious binder
- Fine sand
- Water
It does not normally contain the same large stone aggregate found in conventional concrete.
That means it can enter:
- Lettering
- Fine corners
- Small noses
- Feather patterns
- Leaf veins
more easily.
A concrete-art FAQ specifically confirms that mortar mix, sand mix, and bagged concrete can all be used for concrete artwork, with modifications such as fibers or pozzolans sometimes added to improve performance.
Mortar Is Not Automatically Stronger
Fine texture should not be confused with structural superiority.
Removing coarse aggregate can improve detail.
But conventional aggregate also contributes:
- Dimensional stability
- Economy
- Shrinkage control
ACI notes that good concrete requires the correct balance of cementitious paste and aggregate and that excessive water reduces quality.
Therefore, mortar is best chosen because of:
geometry and detail
not because mortar is always “better concrete.”
When I Would Use Mortar Mix
I would strongly consider mortar or sand mix for:
- Small frogs
- Gnomes
- Decorative tiles
- Face plaques
- Small birds
- Garden mushrooms
- Small molds with lettering
- Thin ornament details
When I Would Choose Conventional Concrete Instead
For:
- Large base blocks
- Heavy planters
- Thick stepping stones
- Large pedestals
coarse aggregate can become useful again.
Avoid the DIY Mistake of Adding Too Much Water
One reason makers like mortar is that it can feel easier to pour.
That can encourage the next mistake:
adding extra water until the mixture becomes runny.
The American Cement Association explains that concrete quality depends strongly on the water-cement ratio and recommends keeping water as low as possible while still maintaining enough workability to place and consolidate the concrete properly.
More water may create easier pouring today but contribute to:
- Lower strength
- Greater shrinkage
- Greater porosity
- Surface defects
later.
Use Workability, Not Soupiness
The goal is a mix that can:
- Enter the mold
- Be consolidated
- Release trapped air
without becoming watery.
ACI notes that high workability can be achieved through appropriate mix design and water-reducing admixtures rather than simply adding more water.
Vibrate the Mold
A fine mix still contains trapped air.
QUIKRETE recommends vibrating small decorative castings to bring air bubbles to the surface.
For DIY projects, you can gently:
- Tap the mold
- Tap the support board
- Use a rubber mallet on the outside
Do not beat a fragile silicone mold aggressively.
Fill Fine Details First
For a detailed face or ornament:
- Mix the concrete.
- Apply a small amount into detailed sections.
- Work it into corners.
- Add the remaining mix.
- Tap or vibrate.
This improves contact between the mold and the cement paste.
Mortar vs Concrete
| Characteristic | Mortar/Sand Mix | Conventional Concrete |
|---|---|---|
| Large aggregate | No/very little | Yes |
| Fine detail | Excellent | More difficult |
| Small molds | Excellent | Fair |
| Large thick castings | Possible | Better |
| Surface smoothness | High | More textured |
| Shrinkage control | More mix-dependent | Aggregate helps |
| Beginner detail casting | Very practical | Less ideal |
How Strong Should Concrete Be for Outdoor Garden Ornaments?
Outdoor ornaments need enough strength to survive handling, weather, and freezing conditions, but compressive strength alone does not determine durability.
For typical garden ornaments, a general-purpose concrete in the roughly 3,500–4,000 psi class provides a useful durability benchmark, but mix design matters more than chasing maximum strength. In freezing climates, proper air entrainment, low unnecessary water, sound aggregate, curing, drainage, and moisture control are essential for freeze-thaw durability.
4,000 psi Is a Useful General Reference
QUIKRETE’s standard Concrete Mix is rated at approximately 4,000 psi average compressive strength.
That provides useful context.
You do not necessarily need ultra-high-strength specialty concrete for a:
- Garden mushroom
- Statue
- Planter
- Decorative sphere
But you do need a mix that survives outdoor conditions.
Strength Is Not the Whole Story
A strong laboratory cube does not guarantee a durable garden statue.
Outdoor durability also depends on:
- Water absorption
- Air voids
- Aggregate
- Curing
- Cracks
- Thickness
This becomes especially important in freezing regions.
Freeze-Thaw Resistance Matters
ACI explains that entrained microscopic air bubbles can significantly improve resistance to repeated freeze-thaw cycles by providing space that relieves pressure as water freezes inside concrete.
ACI also notes that concrete exposed to freezing conditions should reach about 3,500 psi / 24 MPa maturity along with appropriate air entrainment and suitable aggregate for good freeze-thaw resistance.
For cold-climate ornaments, I would therefore prioritize:
- Outdoor-rated mix
- Freeze-thaw resistance
- Air entrainment where appropriate
- Proper curing
over simply buying the mix with the largest psi number printed on the bag.
Thin Parts Need Reinforcement More Than Huge Compressive Strength
A statue may fail at:
- Ear
- Finger
- Wing
- Tail
- Narrow base
because those features experience bending.
Concrete is much stronger in compression than tension.
For thin or vulnerable decorative pieces, reinforcement may help.
Options include:
- Suitable fibers
- GFRC
- Embedded reinforcement in larger sections
QUIKRETE’s Crack-Resistant Concrete uses fibers specifically to add strength without requiring conventional metal reinforcement in small cast projects.
Large Pieces May Need Reinforcement
A large statue or planter may require:
- Fiber reinforcement
- Steel reinforcement
- Internal structure
depending on its size and geometry.
Concrete Network notes that structural cast-stone elements may incorporate steel reinforcement to improve tensile and flexural performance.
Do Not Reinforce Tiny Pieces With Random Steel
Putting thick steel wire into a very small ornament can create:
- Inadequate cover
- Rust staining
- Cracking
if water reaches the metal.
Use reinforcement suited to the project.
Strength Selection Guide
| Ornament | Main Requirement |
|---|---|
| Small plaque | Fine detail |
| Small statue | Detail + adequate strength |
| Thin animal legs | Fiber/tensile reinforcement |
| Large statue | Strength + reinforcement |
| Stepping stone | Compressive/flexural durability |
| Planter | Strength + weather resistance |
| Cold-climate ornament | Freeze-thaw resistance |
| Hollow decorative shell | GFRC can be useful |
Outdoor Mixes Need Proper Curing
Even an excellent mix will perform poorly if curing is rushed.
Strength develops through hydration.
Keeping appropriate moisture conditions early in the process helps the concrete gain strength and durability.
How Long Should Concrete Cure Before Removing It From the Mold?
Demolding time depends on ornament size, concrete type, temperature, mold design, and the fragility of the decorative details.
Many small concrete ornaments can be removed from molds after roughly 24–48 hours, but delicate or larger castings may need several days. QUIKRETE recommends at least 48 hours for its cast concrete borders, while some small decorative vase molds can be removed after about 24 hours. Demolding does not mean curing is finished.
Why Demolding Too Early Causes Breakage
Young concrete may feel hard on the surface but still have limited strength.
This is especially risky for:
- Ears
- Fingers
- Wings
- Thin rims
- Narrow legs
The mold may hold those sections together until you remove it.
Then they break.
QUIKRETE Examples Show Why Timing Varies
For cast concrete borders, QUIKRETE says the concrete should cure for about 48 hours before mold removal.
For small vase castings in plastic bottles, it allows about 24 hours, while glass molds are left for at least four days before breaking the glass away.
That demonstrates an important rule:
The shape and removal method matter.
Do Not Use One Demolding Time for Every Mold
A thick garden sphere may be strong enough to handle fairly quickly.
A detailed angel with thin wings may need much more patience.
Consider:
- Mix
- Temperature
- Thickness
- Mold flexibility
- Detail
before removal.
Flexible Molds Reduce Stress
Silicone and polyurethane rubber molds can be peeled away gradually.
That reduces mechanical force on the casting.
Rigid molds may require more movement and leverage.
The more difficult the demolding process, the longer I would let fragile concrete gain strength first.
Curing Continues After Demolding
Removing the mold is not the end of curing.
After demolding:
- Protect the ornament from rapid drying.
- Avoid hard impacts.
- Avoid freeze exposure.
- Continue the curing process appropriate for the mix.
Concrete gains strength over time.
Do not move a newly demolded 30 kg statue around the garden as though it is fully mature.
Avoid Immediate Grinding
Do not automatically grind every pinhole or seam.
Cutting and grinding hardened concrete can release respirable crystalline silica. CDC/NIOSH identifies cutting, grinding, polishing, and drilling as activities that can generate hazardous silica-containing dust.
When grinding is necessary, use appropriate dust-control methods rather than creating a dry airborne cloud.
Wet Concrete Safety Matters Too
Wet cementitious mixtures are caustic.
OSHA warns that wet concrete and cement can cause skin irritation and chemical burns and recommends suitable protective gloves, clothing, footwear, and eye protection for exposure.
For a simple garden project:
- Wear waterproof/alkali-resistant gloves.
- Wear eye protection.
- Avoid prolonged skin contact.
- Wash exposed skin promptly.
Curing Timeline Guide
| Stage | Typical Approach |
|---|---|
| Pour | Fill and vibrate |
| First 24 hours | Leave undisturbed |
| 24–48 hours | Some small castings may demold |
| 48+ hours | Safer for many ornaments |
| Several days | Better for fragile castings |
| After demolding | Continue appropriate curing |
| Full service | Follow mix manufacturer’s requirements |
My Insights: What Is the Best Concrete Mix for Making Garden Ornaments
The best concrete mix is the one that balances detail, strength, workability, and exposure rather than simply using the strongest bag available.
For most DIY garden ornaments, I recommend a fine sand-based casting mix, Sand/Topping Mix, or quality countertop-style concrete for detailed molds. Use fiber-reinforced concrete for thicker statues and GFRC for thin, complex work. Keep water low, vibrate the mold, cure patiently, and specify freeze-thaw durability when the ornament will remain outdoors in cold climates.
My First Insight: Aggregate Size Should Match Ornament Detail
This is the most useful selection rule.
For very small details:
fine sand = helpful
large gravel = problematic
QUIKRETE’s under-2-inch recommendation for Sand/Topping Mix supports exactly this principle.
My Second Insight: My Best Beginner Choice Is a Bagged Fine Mix
Beginners often search for a homemade formula such as:
1 part cement + 2 parts sand + X amount of water.
That can work, but every variable adds another failure point.
For a first project, I would buy a preblended:
- Sand/topping mix
- Fine casting mix
- Countertop mix
and follow the manufacturer’s water instructions.
This gives you a more repeatable starting point.
My Third Insight: Standard 1:2:3 Concrete Is Not My First Choice for Detailed Statues
QUIKRETE gives a traditional general concrete ratio of approximately:
**1 part portland cement
- 2 parts sand
- 3 parts gravel**
by volume.
That is a useful general concrete recipe.
But I would not make it my first choice for a tiny detailed mold because the gravel may be too large.
Use the recipe according to scale.
My Fourth Insight: Water Is More Dangerous Than Most Beginners Realize
A runny mix looks attractive because it flows easily.
But the American Cement Association explains that lower water-cement ratios generally improve strength and durability when adequate workability and consolidation can still be achieved.
Therefore:
do not solve poor flow only by adding water.
Consider:
- Finer aggregate
- Better vibration
- Appropriate plasticizer
- Casting-specific mix
instead.
My Fifth Insight: Use Fibers for Fragile Geometry
For ornaments with:
- Thin ears
- Narrow wings
- Long edges
- Small projecting details
fibers can help control cracking and improve toughness.
QUIKRETE specifically recommends fiber-containing Crack-Resistant Concrete for small casting work.
My Sixth Insight: GFRC Is Best When Weight and Thinness Matter
If I were producing:
- Large hollow statues
- Thin wall panels
- Architectural garden ornaments
I would seriously consider GFRC.
Concrete Network notes that GFRC can create ornate shapes while being much lighter than conventional precast concrete.
That can make:
- Shipping
- Installation
- Demolding
easier.
My Seventh Insight: Outdoor Durability Starts Inside the Mix
Sealer helps.
But it cannot turn poor concrete into durable concrete.
In freezing areas, ACI emphasizes:
- Air entrainment
- Suitable aggregate
- Adequate strength before freeze exposure
So if you manufacture garden ornaments commercially, ask whether your formulation has been designed for its climate.
My Eighth Insight: Detail and Strength Require a Compromise
The finest possible mortar can reproduce beautiful detail.
But a larger statue may benefit from aggregate and reinforcement.
That means professional producers often use different mixes for different products.
For example:
Small decorative face: fine casting mix
Large garden lion: stronger fiber-reinforced concrete
Thin architectural panel: GFRC
There is no reason all three should use the same recipe.
My Ninth Insight: Test the Mix Before Production
Before making 50 identical ornaments:
- Make one test casting.
- Record water quantity.
- Record demolding time.
- Check pinholes.
- Check edge breakage.
- Check color.
- Cure it fully.
- Test outdoor performance.
Then adjust the process.
ACI mix-design guidance likewise emphasizes using performance records or trial mixtures when selecting water-cementitious ratios and proportions for specific performance requirements.
My Tenth Insight: Consistency Is More Valuable Than a Secret Recipe
For repeatable garden ornaments, record:
- Mix brand
- Batch weight
- Water
- Pigment
- Fiber
- Mixing time
- Vibration
- Mold release
- Demolding time
- Curing method
A brilliant mix used inconsistently can produce inconsistent products.
Best Mix by Ornament Type
| Ornament | My Recommended Starting Mix |
|---|---|
| Small animal | Fine sand/topping mix |
| Garden gnome | Fine fiber-reinforced casting mix |
| Leaf plaque | Sand/topping mix |
| Detailed face | Countertop/fine casting mix |
| Garden sphere | Fine concrete |
| Heavy statue | Crack-resistant/standard concrete |
| Large planter | Standard or fiber-reinforced concrete |
| Thin ornament | GFRC |
| Cold-climate ornament | Outdoor freeze-thaw appropriate mix |
My Preferred Beginner Formula
If I were making a small garden ornament for the first time, I would choose:
**preblended fine casting or Sand/Topping Mix
- manufacturer-specified water
- careful mold filling
- light vibration
- at least 24–48 hours before cautious demolding
- continued curing**
I would not add extra water simply to make pouring easier.
My Preferred Commercial Formula
For repeat production, I would develop the mix around:
**fine aggregate
- controlled low water-cementitious ratio
- water reducer where necessary
- fibers appropriate to the product
- freeze-thaw protection where required
- documented curing process**
Then I would validate it through repeated test castings.
Safety Still Matters
Garden ornaments are a creative project, but concrete is still a construction material.
Wet cement can burn skin, and grinding dry concrete can produce respirable silica dust. OSHA and CDC/NIOSH both recommend controlling these exposures rather than treating them as harmless craft dust.
Use appropriate:
- Gloves
- Eye protection
- Dust control
- Ventilation/work practices
throughout production.
My Final Answer
So, what is the best concrete mix for making garden ornaments?
For most small and detailed ornaments, choose:
a fine sand-based concrete, Sand/Topping Mix, or countertop-style casting mix.
For larger thick statues, use:
a conventional or fiber-reinforced concrete mix.
For thin, complex, lightweight pieces, consider:
GFRC.
The best mix should give you:
- Fine enough aggregate for the mold
- Enough workability without excess water
- Good consolidation
- Appropriate outdoor strength
- Freeze-thaw resistance where needed
- Predictable curing
Do not choose concrete based on compressive strength alone.
For decorative casting, the best mix is the one that fills the mold cleanly, cures densely, and survives the environment where the finished ornament will actually live.
Conclusion
Use fine sand-based concrete for detailed ornaments, fiber-reinforced concrete for larger pieces, and GFRC for thin complex castings. Control water, vibration, curing, and outdoor durability carefully.